CSS Text Effects
Simple CSS Text Effects in Dreamweaver
CSS Styles are very useful for maintaining a website's appearance from a single file. In this tutorial you will learn how to create simple text effects using CSS Styles in Dreamweaver.
Prerequisite Knowledge
This text effects tutorial teaches you how to use CSS to style text in Dreamweaver and thus assumes you are familiar with the basics of CSS. If you are new to web design or Adobe Dreamweaver we recommend you read our CSS Tutorial first.
You Are Here ::: Home >> Free Tutorials >> Dreamweaver Tutorials >> Text EffectsText Links Rollover
This effect is got by using the hover property for the <a> tag or any named css style used for links. For defining the default text link rollover throughout the site you can set the a:hover style. Open your site in Dreamweaver and do the following:
Open any page of your site and then view the CSS Styles Panel (select window > CSS Styles):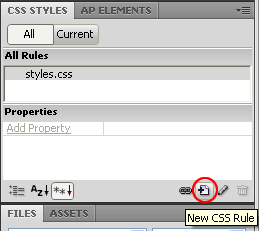

Text Case Setting
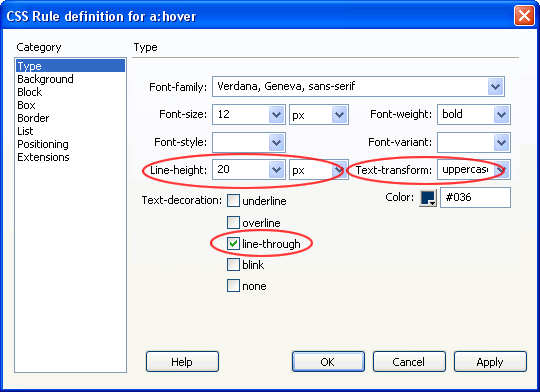
In case you want a style that always displays in upper or lower case no matter how the text is typed you can set the Text-Transform property to capitalize, uppercase or lowercase.
Text Spacing
To make the text appear neatly spaced on your site and for easy readability you can set the Line Height property for your text or links (as in example screenshot above).
Tip: Set the line height to approximately 1.5 (one and a half) times the font size for it to look smart. We generally use a font size of 13 pixels and line height of 20 pixels.
Line-through Effect
If you are selling products on your site you might want to give a discount and show the old and new prices (example: $100 $50). To give a strike through effect for the old price you can make a style with the Line-through property in the Text-decoration section ticked (as in example screenshot above).
Note: The below settings are used only for lower versions of Dreamweaver.
Dreamweaver 8 and Below Instructions
Setting a:hover - Select Advanced in the Selector Type. Now select a:hover from the Selector list box.
Setting any other link style's hover - if you have already created a css style called say "links", to set the links:hover style - Select Advanced in the Selector Type. Now type links:hover in the Selector list box space. [To use this style just select and right click the <a> tag in the tag selector located at the bottom left of the Document window. For the Set Class attribute select links from the list.]
- Tick the checkbox none if you don't want any underline to appear for the links on rollover.
- Tick underline if you want it to appear (this is usually used if the a:link or .links style is given the none property for no underline to appear for the links without rolling over them).
- Give the weight as bold.
- Change the link color property to something other than the a:link color.
Software Required
Adobe Dreamweaver (Macromedia Dreamweaver prior to version 8). Please check out the compatible versions listed in the box below. Since this tutorial series covers the core functions of Dreamweaver to create cool text effects using CSS styles in Dreamweaver, mostly any version of these software should be fine.
Compatible Versions of Dreamweaver for this Tutorial
Note: The instructions in this tutorial are same across all Dreamweaver versions listed above; Screenshot images (if any) may differ. Recommended Version: Dreamweaver CS6