Sunflower Artwork
Draw a sunflower realistic with Fireworks
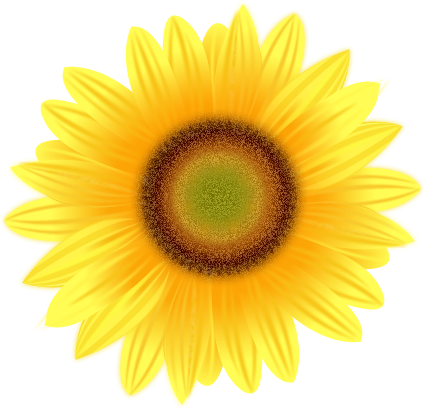
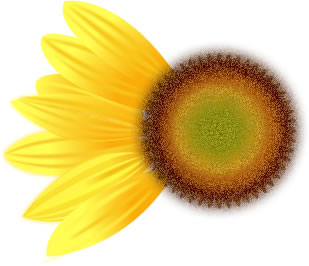
In this tutorial you are going to learn how to draw a realistic sunflower vector using Adobe Fireworks CS4+ as shown below.
.
Prerequisite Knowledge
This tutorial teaches you how to create a real sunflower using Fireworks and thus assumes you are familiar with some design software, even if you are new to Fireworks. However be assured that our detailed instructions can be followed by even a total novice.
You Are Here ::: Home >> Free Tutorials >> Adobe Fireworks CS4+ Tutorials >> Sunflower Paintings
Sunflower Artwork with Adobe Fireworks CS4+
We are going to split the tutorial into two sections for clarity of purpose:
- Create the sunflower central disc (seeds)
- Create the sunflower petals
Create the Sunflower Central Disc
Color Palette - Sunflower Seeds
- Step 1 : Open Adobe Fireworks CS4+ and create a new document of size 900x900 pixels.
- Step 2 :
Draw a circle using Ellipse Tool
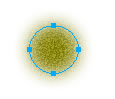
 . Click on the circle set the Fill color as #8C8910 and Stroke color as none. To apply Feather Effect, click on Edge from Properties panel, choose Feather and set the feather value to 18. Next you need to apply a noise effect to it. To do this click on the tiny blue circle with "i" next to the Add Noise filter (Edit and arrange live filters button) and set the following values for the filter: Amount as 12. The image will look as below:
-
Step 3 : Draw a star using the Star Tool
 . Now we need to place the star behind the circle, go to Modify > Arrange > Send to Back (Ctrl+Shift+Down arrow). Next select the star and set the Fill color as #949118 and Stroke color as none. To apply Feather Effect, click on Edge from Properties panel, choose Feather and set the feather value to 16.
 - Step 4 :
Draw another star using the Star Tool . Now we need to place the star behind the first star, go to Modify >> Arrange >> Send to Back (Ctrl+Shift+Down arrow). Next select the star and set the Fill color as #CE910B and Stroke color as none. To apply Feather Effect, click on Edge from Properties panel, choose Feather and set the feather value to 5. The image will look as below:
- Step 5: Draw another circle using Ellipse Tool . Now place the circle behind the second star, go to Modify >> Arrange >> Send to Back (Ctrl+Shift+Down arrow). Now select the star and set the Fill color as #DC9F23 and Stroke color as none. To apply Feather Effect, click on Edge from Properties panel, choose Feather and set the feather value to 6. Now you have to apply noise effect, for this you need to click on the tiny blue circle with "i" next to the Add Noise filter (Edit and arrange live filters button) and set the following values for the filter: Amount as 12. The image will look as below:
- Step 6: Draw a third circle and place the circle behind the second circle, go to Modify >> Arrange >> Send to Back (Ctrl+Shift+Down arrow). Now select the star and set the Fill color as #9A5010 and Stroke color as none. To apply Feather Effect, click on Edge from Properties panel, choose Feather and set the feather value to 16. The image will look as below:
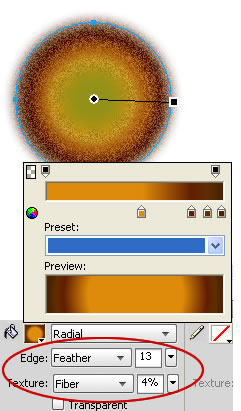
- Step 7: Yet again draw a big circle and place the circle behind the third circle, go to Modify >> Arrange >> Send to Back (Ctrl+Shift+Down arrow). Select the circle and set the Fill color as #DE8B0B and Stroke color as none. Now you need to apply gradient effect to the circle shape. For this click the circle shape, choose the following options:
[a] Select the Fill color and go to Fill category >> select Gradient >> Choose Radial option
[b] Now click the Fill color, and then click on the small color rectangle that is on the left side and set its color to #DE8B0B.
[c] After that, click on the small color rectangle that is on the right side and set its color to #4C2100.
Now add another two rectangle by clicking the ‘+’ symbol in between the two small color rectangle and set the colors as #601E00 and #5F2E03. - Step 8: Apply a Feather Effect: click on Edge from Properties panel, choose Feather and set the feather value to 13. Now you need to apply Fiber Texture to the radial circle for this select the circle and click on Texture from Properties panel, choose Fiber and set the Amount of Texture to 4%.
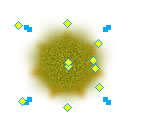
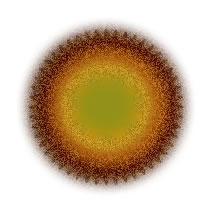
- Step 9: Next apply a noise effect as before. For this you need to click on the tiny blue circle with "i" next to the Add Noise filter (Edit and arrange live filters button) and set the following values for the filter: Amount as 20. See the illustration below that will show how to set the colors and apply textures and Noise:
- Step 10: Go to Window >> Auto shapes Properties insert Star shape. Keep the settings as Points: 48, Radius1: 103, Roundness1: 69.66524, Radius2: 64.47511 and Roundness2: 16.25632 as shown below:
- Step 11: Select the star and set the Fill Color as #752C03 and reduce the Opacity to 60 . Now place the star behind the third circle, go to Modify >> Arrange >> Send to Back (Ctrl+Shift+Down arrow).
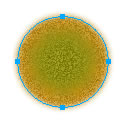
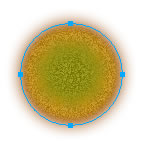

Now you have completed the central disc of the sunflower. Your vector should look the below image:
Create the Sunflower Petals
Color Palette - Sunflower Petals
- Step 1: Draw a petal shape of your own See the illustration below that shows how to draw a petal.
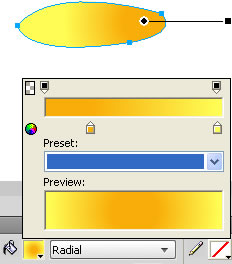
- Step 2: Next select the petal shape and set its Fill color as #F9AD09 and Stroke color as none. While the petal shape is still selected, do the following:
[a] Select the Fill color go to Fill category >> select Gradient >> Choose Radial option
[b] Now click the Fill color, and then click on the small color rectangle that is on the left side and set its color to #F9AD09.
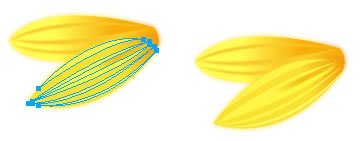
[c] After that, click on the small color rectangle that is on the right side and set its color to #FFFD55. The image below will describe how the radial effect will appear: - Step 3: In the petal shape draw a curve inside the petal as shown below. Select the curve and set the Fill color as #F8CB2C and to apply Feather Effect, click on Edge from Properties panel, choose Feather and set the feather value to 1.
- Step 4: Similarly draw another two curves and place the curves as shown below. Select the curve and set the Fill color as #F8CB2C and to apply Feather Effect, click on Edge from Properties panel, choose Feather and set the feather value to 1. The image will look as below:
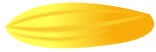
- Step 5: Again draw another petal over the previous petal as shown below. Now select the second petal shape and set the Fill color as #F09809 and Stroke color as none. While the petal shape is still selected, do the following:
[a] Select the Fill color go to Fill category >> select Gradient >> Choose Linear option
[b] Now click the Fill color, and then click on the small color rectangle that is on the left side and set its color to #F09809.
[c] After that, click on the small color rectangle that is on the right side and set its color to #FAE130. - Step 6: Draw another five curves inside the petal and place the curves as shown below. Select the curve and set the Fill color as #FFF349 and to apply Feather Effect, click on Edge from Properties panel, choose Feather and set the feather value to 1.
- Step 7: Draw another five curves inside the petal and place the curves as shown below. Select the curve and set the Fill color as #FFF349 and to apply Feather Effect, click on Edge from Properties panel, choose Feather and set the feather value to 1. The image will look as below:
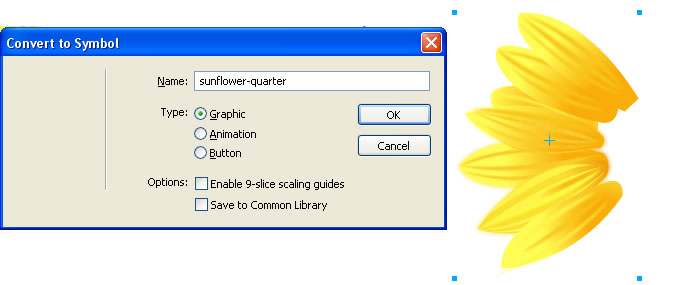
- Step 8: Similarly create a bunch of petals as shown below. Now you need to convert the petals as Symbols to reuse the petals in different directions. For this you need to go to Modify > Symbol > Convert to Symbol (F8). A pop up window will appear in that Name the symbol as sunflower-quarter and set the Type as Graphic and then click Ok. The image below shows how to create a bunch of petals and Convert to Symbol.
- Step 9: Now place the petals nearer to the center of the sunflower as shown below.
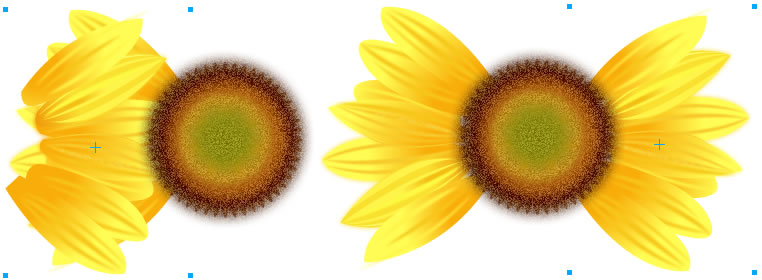
- Step 10: Next copy and paste the petals Symbol (duplicating it). Select the duplicated symbol and select Modify > Transform > Rotate 180 degree. Now move the duplicate petals Symbol to the opposite side. The result will look as below:
- Step 11: Similarly copy and paste the two petal Symbols go to Modify > Transform > Rotate 90 degree CW. Now adjust the petals Symbol to make it realistic. Now draw a circle using Ellipse Tool and set the Fill color as #FF9900. To apply Feather Effect, click on Edge from Properties panel, choose Feather and set the feather value to 60. Finally image will look as below:
Using this sunflower in different sizes and perspectives we have created a beautiful bouquet as shown below:

Software Required
Adobe Fireworks CS4+. If you are using the CS3 and below version please read Sunflower Art with Fireworks.
Compatible Versions of Adobe Fireworks for this Tutorial
Adobe Fireworks CS3 & below users: For lower versions of Fireworks, some features, steps and screenshot images may differ. Please read the CS3 & Below version of this free web design tutorial - Sunflower Art with Fireworks.
Recommended Version: Fireworks CS6