Customization Guide
Simple guide to customizing SmartWebby templates
Please follow the outlined steps in the below list of links to customize your purchased SmartWebby template. We have done a sample customization with screenshots to help you further.
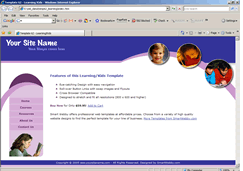
Sample Customization: Customizing Template 62 for a Photography website
![]()
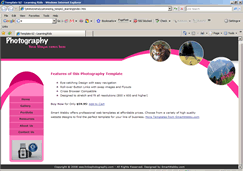
Screenshots showing the template Before and After Cutomization
SmartWebby.com Dreamweaver Template Customization Guide
- Step 1: Dreamweaver Site Definition - Setting up your template website in Dreamweaver
- Step 2: Custom Colors - Changing your dreamweaver template's design colors
- Step 3: Custom Header - Customizing the website header with your Site Name and Slogan
- Step 4: Custom Links - Modifying your website Links - Text links or Rollover links
- Step 5: Custom Footer - Changing the website's Footer Text
- Step 6: Custom Graphics - Replacing Photos and Images used in your template's design
- Step 7: Custom Content - Inserting Content into Existing Pages and Adding New Pages
- Step 8: Custom Styling Text - Changing your text styling using CSS Styles
- Custom Flyouts - Modifying your dreamweaver template's Drop-down Menus if included
- Custom Scroller - Customizing the News Scroller if included
- Custom Swaps - Customizing the Swap Images if included